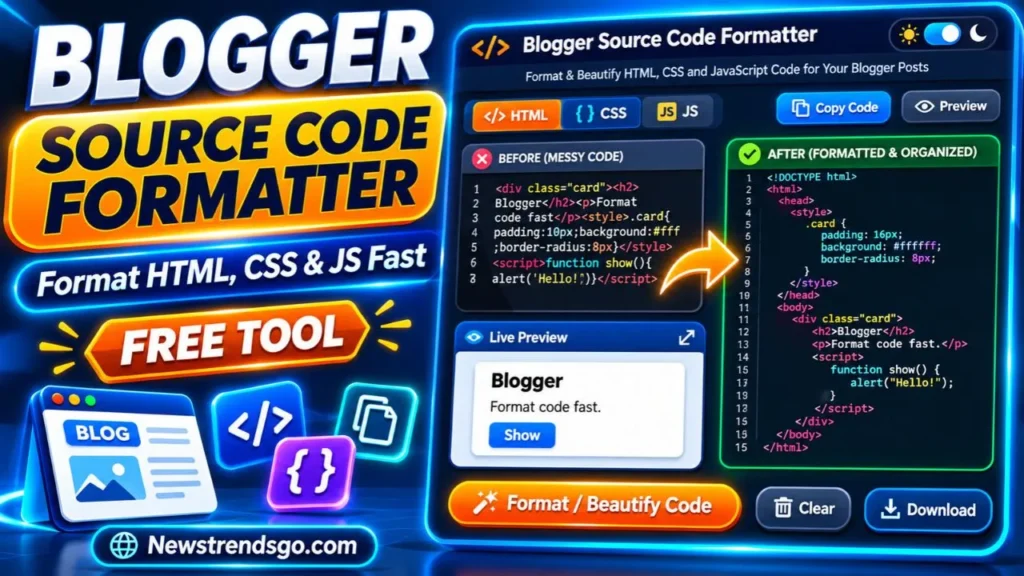
Blogger Source Code Formatter
Clean up HTML, CSS, JavaScript, XML, or JSON, then create a stylish, Blogger-ready code block you can copy into your post.
1. Paste Your Code
Choose a language and enter the source code you want to format or display.
Formatting is best-effort for HTML, CSS, JavaScript, and XML. JSON is validated before formatting. For advanced language syntax, always review your output.
2. Get Your Result
Switch between formatted source and an HTML snippet for Blogger.
Use Blogger’s HTML view to paste the generated embed. Do not paste the embed into Compose view.
3. Live Code Block Preview
See how your displayed source code will look in a Blogger post.
Format or generate a code block to preview it here.Quick Instructions
- Choose HTML, CSS, JavaScript, XML, or JSON and paste your code.
- Click Format Code to improve spacing and indentation.
- Choose your code block style and whether to display line numbers.
- Click Generate Blogger HTML, then Copy Result.
- In Blogger, open the post’s HTML view and paste the snippet where you want the code block to appear.
Blogger Source Code Formatter – Free Online HTML, CSS & JavaScript Code Formatter
Looking for a free Blogger Source Code Formatter that makes your HTML, CSS, JavaScript, XML, or JSON code clean, organized, and easy to share on your blog? You’re in the right place.
If you’ve ever tried to publish programming code in a Blogger post, you probably know how frustrating it can be. Code may appear unorganized, special characters may interfere with HTML, and long snippets can be difficult for visitors to read.
Our Blogger Source Code Formatter helps solve these problems by organizing your source code and generating attractive, ready-to-use HTML code blocks for Blogger.
You can format your code, customize its appearance, enable line numbers, preview the results, and copy the generated HTML directly into your Blogger posts.
The best part? It’s completely free, works directly in your browser, and doesn’t require registration or an API key.
Whether you’re a beginner learning HTML or an experienced blogger publishing coding tutorials, this online source code formatter makes sharing code easier.
Free Blogger Source Code Formatter Online
Our Blogger Source Code Formatter is designed for bloggers, web developers, programmers, and content creators who want to display source code in a clean, professional format.
Instead of manually adjusting spaces, indentation, and HTML entities, you can use the tool to prepare readable source code and generate an HTML block for your blog.
The tool supports five popular programming and markup languages:
- HTML Formatter: Organize HTML elements, tags, and document structures.
- CSS Formatter: Improve the readability of CSS rules and declarations.
- JavaScript Formatter: Apply basic indentation and spacing to JavaScript code.
- XML Formatter: Organize XML markup for easier reading and editing.
- JSON Formatter: Beautify valid JSON data with consistent indentation.
You can also choose between dark and light code block designs, enable or disable line numbers, and download your results.
Ready to format your code? Use the free Blogger Source Code Formatter above, paste your source code, and click Format Code to get started.
How to Use the Blogger Source Code Formatter
Using our online source code formatter is simple. You don’t need programming experience to generate a readable code block for your Blogger website.
Follow these steps to format your code and prepare it for publication.
Step 1: Select Your Programming Language
Start by choosing the type of code you want to format.
The tool includes a dropdown menu with the following options:
- HTML
- CSS
- JavaScript
- XML
- JSON
Selecting the correct language helps the formatter apply the appropriate formatting rules.
For example, if you’re preparing a tutorial about HTML buttons, select HTML. If you’re sharing a stylesheet for a website, choose CSS.
Step 2: Paste Your Source Code
Find the text editor labeled Source Code.
Copy the code you want to format and paste it into this field.
You can enter a short HTML example, a CSS stylesheet, a JavaScript function, or a larger block of supported source code.
The editor accepts up to 180,000 characters per formatting operation.
Before formatting, make sure you’ve selected the appropriate programming language.
Step 3: Choose Your Indentation
The formatter allows you to select your preferred indentation style.
You can choose:
- 2 spaces: Creates compact indentation that works well for shorter code examples.
- 4 spaces: Provides wider indentation that may be easier to follow in complex code structures.
Both options help visually separate nested elements, functions, and other sections of your code.
For most Blogger tutorials, two-space indentation offers a good balance between readability and compact presentation.
Step 4: Click Format Code
Once you’ve entered your code, click Format Code.
The formatter will process your source and display the formatted result in the output editor.
Depending on the selected language, the tool attempts to organize code elements and improve indentation.
For JSON, the tool also checks whether the entered data can be parsed as valid JSON.
If the JSON contains a syntax error, an error message appears instead of a formatted result.
Important: HTML, CSS, JavaScript, and XML formatting is best-effort. Advanced syntax, unusual structures, or whitespace-sensitive code may require manual review.
Step 5: Generate Blogger HTML
After formatting your source code, click Generate Blogger HTML.
This feature creates a reusable HTML snippet that displays your source code as readable text inside a styled code block.
The generated snippet contains the necessary HTML structure and escaped characters to help prevent code examples from being interpreted as active HTML elements.
For example, a heading tag can appear as source code rather than being displayed as an actual heading.
This is particularly useful when creating programming tutorials, coding lessons, and Blogger customization guides.
Step 6: Customize Your Code Block
Before copying your Blogger HTML, you can adjust its appearance.
The tool offers two themes:
Dark Theme
A dark background with light-colored text. This style works particularly well for technology blogs, programming tutorials, and developer-focused websites.
Light Theme
A light background with darker text. This option is suitable for blogs with minimalist layouts or light-colored designs.
You can also enable the Show Line Numbers option.
Line numbers make long examples easier to follow because readers can locate a specific line when following instructions.
For example, you might tell readers to edit line 12 of a code example.
Once you’ve selected your preferred settings, the tool updates the generated code block and its preview.
Step 7: Preview Your Code Block
The Live Code Block Preview section shows how your formatted source code will appear within a styled block.
You can inspect the spacing, line numbers, and overall readability before copying the result.
This helps you choose a design that matches your website.
The preview is intended to show the appearance of the code block. It does not execute JavaScript or render the source code as a functioning webpage.
Step 8: Copy or Download Your Code
When you’re satisfied with the result, click Copy Result.
The tool copies the content of the currently selected output tab.
If you’re viewing Formatted Code, it copies your formatted source.
If you’re viewing Blogger Embed HTML, it copies the generated HTML code block.
You can also click Download .txt to save the result locally. When exporting a generated Blogger embed, the downloaded file uses an HTML extension.
Now your code is ready to use.
How to Add Formatted Source Code to a Blogger Post
After generating your HTML code block, the next step is adding it to your Blogger article.
Blogger includes an HTML editing mode that allows you to work with the markup of a post.
Here’s how to add your formatted source code.
1. Open Your Blogger Dashboard
Visit Blogger and sign in to your account.
Select the blog where you want to publish the code example.
From the dashboard, navigate to Posts.
You can create a new post or edit an existing article.
2. Switch to HTML View
Open the post editor and locate the option for switching between Compose view and HTML view.
Select HTML View.
This allows you to insert HTML markup directly into the post.
The exact appearance of this control may vary depending on Blogger’s current interface.
3. Paste the Generated Code Block
Return to the Blogger Source Code Formatter and select the Blogger Embed HTML tab.
Click Copy Result.
Go back to your Blogger post and paste the generated snippet at the location where you want the source code to appear.
Avoid pasting the generated markup as ordinary text in Compose view because Blogger may display the HTML tags rather than interpreting them as the intended code block.
4. Preview Your Blogger Post
After inserting the code, preview your article.
Check that:
- Your source code appears inside the styled container.
- The text is readable.
- HTML tags appear as text rather than functioning elements.
- Line numbers display correctly if enabled.
- Long lines can be viewed without damaging the page layout.
- The design fits your blog on desktop and mobile devices.
If everything looks correct, your formatted code block is ready to publish.
What Is a Blogger Source Code Formatter?
A Blogger Source Code Formatter is an online utility that helps organize programming code and prepare it for display in Blogger articles.
It typically performs two related tasks.
The first is code formatting, which improves the visual organization of source code through indentation, spacing, and line breaks.
The second is code presentation, which converts source code into a form suitable for displaying inside an HTML document.
These functions are related, but they are not identical.
For example, formatting an HTML snippet makes its structure easier to read. Escaping the snippet’s special characters allows visitors to see the original markup without the browser rendering it as active HTML.
Our tool combines both capabilities.
It allows you to format supported code and generate a styled HTML block for publication.
This makes it particularly useful for Blogger websites that publish coding examples, web development tutorials, and customization guides.
Why Should You Format Source Code Before Publishing It?
Publishing poorly organized source code can make even a useful tutorial difficult to understand.
Readers may struggle to identify opening and closing tags, nested elements, or individual CSS declarations.
Clean formatting helps solve these problems.
Improve Code Readability
Readable code allows visitors to follow instructions more easily.
Indentation helps readers understand how individual elements relate to one another.
For example, correctly indented HTML makes it easier to distinguish a parent container from the elements inside it.
This is particularly helpful for beginners learning HTML and CSS.
Make Programming Tutorials Easier to Follow
If your blog includes step-by-step coding instructions, source code presentation becomes an important part of the user experience.
Visitors should be able to identify the code they need without struggling through disorganized text.
A consistent code block design can make programming tutorials feel more structured and professional.
Create a Consistent Blog Design
Using different code block styles throughout your blog can create an inconsistent appearance.
A code formatter with reusable designs allows you to display examples using the same background colors, spacing, and typography.
This is useful when managing a large technology website containing dozens of programming tutorials.
Improve Mobile Readability
Long source code lines can create horizontal overflow on mobile devices.
Our generated code blocks include horizontal scrolling, allowing readers to inspect long lines without forcing the entire webpage to expand.
This is particularly useful for CSS rules, HTML attributes, and JavaScript expressions.
Save Time Preparing Code Examples
Instead of manually formatting and escaping each example, you can use one tool to complete several preparation steps.
This can save time when publishing multiple tutorials.
However, formatting should not replace testing. Always verify that your original code continues to function correctly before recommending it to readers.
HTML Formatter for Blogger
HTML is one of the most important languages for Blogger customization.
Bloggers frequently use HTML to create buttons, banners, tables, custom sections, and content layouts.
However, HTML can become difficult to read when multiple elements are written without clear indentation.
An HTML formatter attempts to organize these elements so that their structure is easier to follow.
For example, consider this source code:
<div class="card"><h2>Hello World</h2><p>Welcome to my blog.</p></div>A formatted version might look like this:
<div class="card">
  <h2>Hello World</h2>
  <p>Welcome to my blog.</p>
</div>
Both examples represent the same basic document structure.
The second is generally easier to read and modify.
Our HTML Formatter is useful for organizing ordinary HTML examples and preparing them for presentation in Blogger tutorials.
Keep in mind that whitespace can be meaningful in HTML. Elements such as pre, textarea, and certain inline layouts may require special care. Review the output before using it as functioning website code.
CSS Formatter for Blogger
CSS controls the visual appearance of websites.
It defines colors, backgrounds, fonts, margins, padding, borders, and responsive layouts.
Bloggers often use custom CSS to personalize themes or add design elements.
When CSS rules become lengthy or poorly organized, editing them can be difficult.
Consider this example:
.button{background:#2563eb;color:white;padding:12px;border-radius:8px}A formatted version might appear as:
.button {
  background: #2563eb;
  color: white;
  padding: 12px;
  border-radius: 8px;
}
The formatted version makes each property easier to identify.
Using our CSS Formatter, you can prepare styling examples for tutorials about Blogger buttons, navigation menus, responsive layouts, and website customization.
For advanced CSS involving custom properties, complex functions, or unusual syntax, verify the result before adding it to a live stylesheet.
JavaScript Formatter for Blogger
JavaScript allows developers to create interactive website features.
Many Blogger tutorials include JavaScript examples for buttons, menus, calculators, and other custom functionality.
Formatting JavaScript helps make functions and code blocks easier to follow.
For example:
function greet(name){if(name){console.log("Hello, "+name)}else{console.log("Hello!")}}A more readable presentation could be:
function greet(name) {
  if (name) {
    console.log("Hello, " + name);
  } else {
    console.log("Hello!");
  }
}
The organized version makes it easier to understand the function’s conditional structure.
Our JavaScript Formatter can help prepare straightforward JavaScript examples for publication.
However, it is not a full JavaScript parser or professional development build system. Certain complex expressions, regular expressions, template literals, and modern language features may not be formatted perfectly.
Always test formatted JavaScript before deploying it to a production website.
If your purpose is only to show JavaScript in a tutorial, use the generated Blogger code block. It displays the script as text without executing it.
XML Formatter for Blogger
XML is commonly associated with structured documents and markup-based systems.
Blogger themes also use XML-based template structures.
When working with theme files, developers may need to inspect or organize XML markup.
An XML formatter can help make nested elements easier to understand.
For example:
<products><product><name>Example</name></product></products>A formatted version can appear as:
<products>
  <product>
    <name>Example</name>
  </product>
</products>
This layout makes the document hierarchy more visible.
Our XML Formatter provides basic markup formatting.
It does not validate an XML document against a schema or guarantee compatibility with Blogger’s theme system.
Because Blogger templates can contain specialized XML structures and expressions, always create a backup before modifying a live theme.
For complex theme files, a dedicated XML-aware development editor may be more appropriate.
JSON Formatter and Beautifier Online
JSON stands for JavaScript Object Notation.
It is widely used for structured data, application configuration, and communication between systems.
Web developers also encounter JSON when working with APIs and JSON-LD structured data.
Poorly formatted JSON can be difficult to inspect.
Consider this example:
{"name":"Newstrendsgo","free":true,"features":["format","copy","embed"]}Our JSON Formatter can convert valid JSON into a more readable layout:
{
  "name": "Newstrendsgo",
  "free": true,
  "features": [
    "format",
    "copy",
    "embed"
  ]
}
The tool uses JSON parsing to validate the input before formatting it.
If the data is invalid, an error message helps you identify that a correction is needed.
This feature is useful for developers, bloggers, and website owners who need to inspect JSON configuration files or structured data examples.
Remember that JSON requires valid syntax. For example, property names must use double quotation marks, and trailing commas are not permitted.
How to Display HTML Code in Blogger Without Executing It
One common problem when publishing an HTML tutorial is that the browser may interpret the example instead of displaying it.
For instance, suppose you want readers to see this HTML code:
<h2>Hello World</h2>If you insert it directly as active HTML, the browser may render it as a heading.
But when writing a tutorial, you often want visitors to see the actual tag.
The solution is to escape HTML special characters.
HTML escaping replaces certain characters with HTML entities.
For example:
| Character | HTML Entity |
|---|---|
< | < |
> | > |
& | & |
" | " |
' | ' |
These entities help represent source code as text inside an HTML document.
Our Generate Blogger HTML feature handles the necessary character escaping when building the code block.
This means you can focus on preparing your tutorial rather than converting every special character manually.
It is important to understand that displaying code and executing code are different tasks.
A code block is designed to show source code to readers. It is not intended to run that source code as a functioning website feature.
What Is the Difference Between a Source Code Formatter and an HTML to XML Parser?
Although these tools may appear similar, they serve different purposes.
A source code formatter improves the visual organization of code by adjusting indentation, spacing, and line breaks.
An HTML to XML parser or escaping tool focuses on transforming text or markup for a particular context.
For example, an escaping tool may replace < with < so that the character can be displayed safely in an HTML text context.
A formatter, on the other hand, attempts to organize the code into a readable structure.
Our Blogger Source Code Formatter provides both basic source formatting and HTML escaping when generating a Blogger code block.
However, it does not convert arbitrary HTML into a fully valid Blogger XML theme.
If your goal is to modify an actual Blogger template, you may need additional XML validation and template-specific processing.
Dark vs. Light Code Blocks: Which Is Better for Blogger?
Both dark and light code blocks can work well on a Blogger website.
The best choice depends on your site’s design and audience.
Dark Code Blocks
Dark code blocks are popular on technology and programming websites.
They create a visual distinction between ordinary article text and programming examples.
They can also resemble the appearance of code editors used by developers.
Our dark theme uses a dark background with light text to create this effect.
Light Code Blocks
Light code blocks can integrate more naturally with blogs that use white backgrounds and minimalist designs.
They may also be preferable when you want the code examples to blend with the overall editorial layout.
Our light theme provides a cleaner, brighter presentation.
Should You Enable Line Numbers?
Line numbers are useful for longer examples and step-by-step tutorials.
They make it easier to reference specific parts of code.
For shorter examples, however, line numbers may take up unnecessary space.
A practical approach is to enable them for detailed programming tutorials and disable them for small code snippets.
You can switch between both options in our tool before generating the final Blogger HTML.
Is the Blogger Source Code Formatter Safe to Use?
The formatter processes the entered source code within your browser and does not require an external formatting API.
You don’t need to create an account or provide personal information to use the tool.
The generated Blogger code block escapes source-code characters so that examples can be displayed as text instead of being interpreted as active HTML.
This is useful when sharing tutorials, but it does not mean every source-code example is safe to execute.
Never run untrusted JavaScript or install unknown code on your website without reviewing it.
The formatting tool also does not automatically detect malware, vulnerabilities, or malicious programming logic.
For sensitive projects, avoid entering credentials, private keys, passwords, or confidential source code into any online tool.
Common Blogger Source Code Formatting Problems
Even with a code formatter, you may encounter problems when publishing code examples.
Here are some common situations and how to address them.
HTML Tags Appear as Actual Page Elements
If your HTML example becomes a heading, button, or image instead of appearing as code, the markup is probably being interpreted by the browser.
Use the Generate Blogger HTML feature and paste the generated snippet in Blogger’s HTML editing mode.
The Code Block Looks Different After Publishing
Blogger themes and existing CSS rules can affect the appearance of embedded elements.
Preview the published design and check for conflicting styles.
You may need to adjust your theme if it applies broad rules to pre, code, or other HTML elements.
Long Code Lines Are Difficult to Read
Long lines are common in programming examples.
The generated Blogger code block includes horizontal overflow handling so readers can scroll through extended lines.
On smaller screens, this is usually preferable to stretching the entire webpage.
JSON Formatting Displays an Error
JSON formatting requires valid JSON input.
Check for missing quotation marks, invalid commas, or unmatched braces.
After correcting the syntax, click Format Code again.
Complex JavaScript Formatting Changes the Code
Our formatter uses lightweight formatting rules rather than a complete JavaScript syntax parser.
If your code contains advanced syntax, always compare the formatted output with the original and test it before publication.
For production-critical scripts, use a dedicated JavaScript formatter that fully understands the language.
The Copy Button Does Not Work
Some browsers restrict clipboard access in certain environments.
If automatic copying is unavailable, select the text in the output field and copy it manually using your keyboard.
You can also download the result.
Best Practices for Publishing Code Tutorials on Blogger
Well-presented source code makes programming articles easier to read, but the surrounding explanation is just as important.
Here are some practical recommendations.
Explain What the Code Does
Before displaying a snippet, briefly explain its purpose.
Readers should know what they can expect from the code and where it should be used.
Keep Examples Relevant
Avoid including unnecessary code that does not contribute to the tutorial.
Short, focused examples are often easier for beginners to understand.
Provide Installation Instructions
If the code is intended for Blogger customization, explain exactly where users should paste it.
For example, a Blogger post, HTML gadget, and theme template may require different installation methods.
Test Your Code
Make sure the original code works before publishing it.
Formatting improves presentation, but it does not guarantee the code is correct.
Use Consistent Code Block Designs
Choose a code block style that matches your website and use it throughout your programming tutorials.
Consistency makes articles easier to navigate and creates a more professional experience.
Make Code Easy to Copy
Readers often want to reuse examples in their own projects.
Presenting code in clearly defined blocks makes it easier to select and copy.
Also consider explaining whether the snippet is intended for direct installation, modification, or educational demonstration.
Frequently Asked Questions About Blogger Source Code Formatter
What is the best free source code formatter for Blogger?
A useful Blogger source code formatter should support common programming languages, offer readable output, escape code for display, and generate HTML that can be inserted into Blogger posts.
Our free tool combines these features with dark and light themes, optional line numbers, a live preview, and copy and download options.
How do I format HTML code for Blogger?
Choose HTML from the language menu, paste your source code, select an indentation size, and click Format Code. Review the result before using it.
If you want to display the HTML as a code example, click Generate Blogger HTML.
How do I add a code box to Blogger?
Generate a Blogger HTML code block using the tool, copy the result, switch your Blogger post editor to HTML view, and paste the generated snippet where you want the code box to appear.
Can I use this tool to format CSS?
Yes. Select CSS and paste your stylesheet. The formatter attempts to organize CSS declarations and braces into a more readable structure.
Does this tool support JavaScript?
Yes. The tool includes a basic JavaScript formatter. However, advanced JavaScript syntax may require a more sophisticated parser, so always verify the formatted result.
Can I format XML code?
Yes. Select XML to apply basic formatting to XML markup. The tool does not guarantee full XML schema validation or Blogger template compatibility.
Can I format JSON online for free?
Yes. Select JSON, paste valid JSON data, and click Format Code. The tool parses the JSON and returns an indented version.
How do I show HTML tags as text in Blogger?
HTML tags must be escaped when you want them to appear as source code instead of rendered elements. Our Blogger HTML generator handles the required character escaping for its generated code blocks.
Does the tool provide syntax highlighting?
The current version provides styled code containers, language labels, and optional line numbers. It does not include full token-by-token syntax highlighting.
Can I customize the code block colors?
You can choose between the available dark and light themes. Additional visual customization can be performed manually by editing the generated HTML styles.
Can I add line numbers to code in Blogger?
Yes. Enable Show Line Numbers before generating the Blogger HTML snippet.
Is the Blogger Source Code Formatter mobile-friendly?
Yes. The tool is designed to work on desktop computers, tablets, and smartphones. The generated code blocks also support horizontal scrolling for long lines.
Can I use the generated HTML in WordPress?
Yes. The generated code block uses ordinary HTML and inline styling, so it can also be used in compatible WordPress HTML blocks, provided your WordPress configuration permits the markup.
Does the formatter fix coding errors?
Not generally. Its primary purpose is formatting and presentation. The JSON formatter validates JSON syntax, but the other language options do not provide comprehensive error detection or automatic code repair.
Is the Blogger Source Code Formatter completely free?
Yes. You can format source code, generate Blogger HTML, preview code blocks, and copy or download the results without paying or registering.
Do I need to install software?
No. The tool runs directly inside a compatible modern web browser.
Format and Share Source Code on Blogger for Free
Creating high-quality coding tutorials requires more than writing functional examples. Your source code should also be organized, readable, and easy for visitors to understand.
With the free Blogger Source Code Formatter by Newstrendsgo, you can format HTML, CSS, JavaScript, XML, and JSON while preparing attractive HTML code blocks for your Blogger posts.
Choose your preferred language, paste your source code, select an indentation style, and generate a Blogger-ready display block. You can preview the result, enable line numbers, switch between dark and light themes, copy the generated HTML, or download your formatted code.
Start using the Blogger Source Code Formatter at the top of this page. Paste your code, click Format Code, and generate a clean code block for your next Blogger tutorial—completely free.